Description
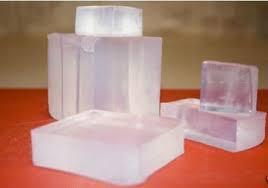
Our Melt and Pour Soap Base has a beautiful, creamy lather, 100% vegetable derived, not tested on animals and is terrific for creating your own soap without the wait involved with cold process. Melt and pour soap making allows for a wide range of creativity. Perfect for beginners! Melt the soap and add your favourite soap additives, botanical extracts, colour, essential oils or fragrance!
This listing is for 500 grams of CLEAR Glycerine Soap Base
Here is an easy soap project idea to get you started! Honeycomb Soap
For this project you will need:
- 500 grams Clear Soap Base
- 1 Tablespoon of Honey
- Bubble wrap cut into pieces to fit into the bottom of your mould cavities
- Silicone Soap Mould or Muffin Mould
- A few drops of soap colour or gold mica (optional)
Honey is a very sought-after additive for soap making for many reasons. Honey has a sweet delicate scent and moistures your skin. Adding honey is a great way to add therapeutic, antimicrobial and anti-inflammatory properties to your soaps.
Tips for working with the bubble wrap
- When you work with bubble wrap, make sure that you cut it without cutting through the bubbles.
- Also cut one row past the size of the mould cavity to make sure that the top of your soap is fully covered with the honey comb look.
- Be careful when you pour your soap that you do not let the bubble wrap float up to the top of the soap. It is a good idea to “glue” the bubble wrap pieces to the bottom of the mould cavity by melting a little bit of clear soap and using it to “glue” or fix the bubble wrap before pouring your soap.
- Last but not least – try this link to a tutorial with some great pictures
Instructions for making Honey Comb Soap
- Cut the soap into small cubes. The base is easy to cut through–it’s almost like slicing a thick block of cheese
- Melt the soap base in a pyrex container gently on a double boiler on your stove or in your microwave in 15 second bursts, checking and stirring the soap until it melted completely, Becareful not to stir to much otherwise you will incorporate too many air bubbles into the soap.
- Next, add your soap colour (not food colouring, soap colour is different), jasmine or other essential oil and Dead Sea Salts. Stir gently and make sure everything is mixed thoroughly
- Line your the bottom of your mould with bubble wrap – bubble side up!
- Pour into your soap mould and wait until soap sets or becomes hard. You can speed up the process by popping your filled mould into the fridge. Once hardened – you can simply pop the soap out of the mould and carefully remove the bubble wrap.
- Wrap your individual soaps with Plastic Wrap or air tight container for storage.
- Place in cellophane bags, create lovely labels tied with ribbon and you have made fabulous soap gifts!
________________________________________________________________________________________
Recommended Colour Additives: Liquid Soap Dye, Mica Powder, Mica Liquid
Recommended Aroma and Natural Skincare Additives:
Skin Safe Fragrant Oils – 3-6%
Skin Safe Clays, Salts, Extracts, Oils and Butters – 1-3%
Melt Point: 50 degrees Celsius. Storage: Room temperature. Air tight container or Sealed with Plastic Wrap


Reviews
There are no reviews yet.